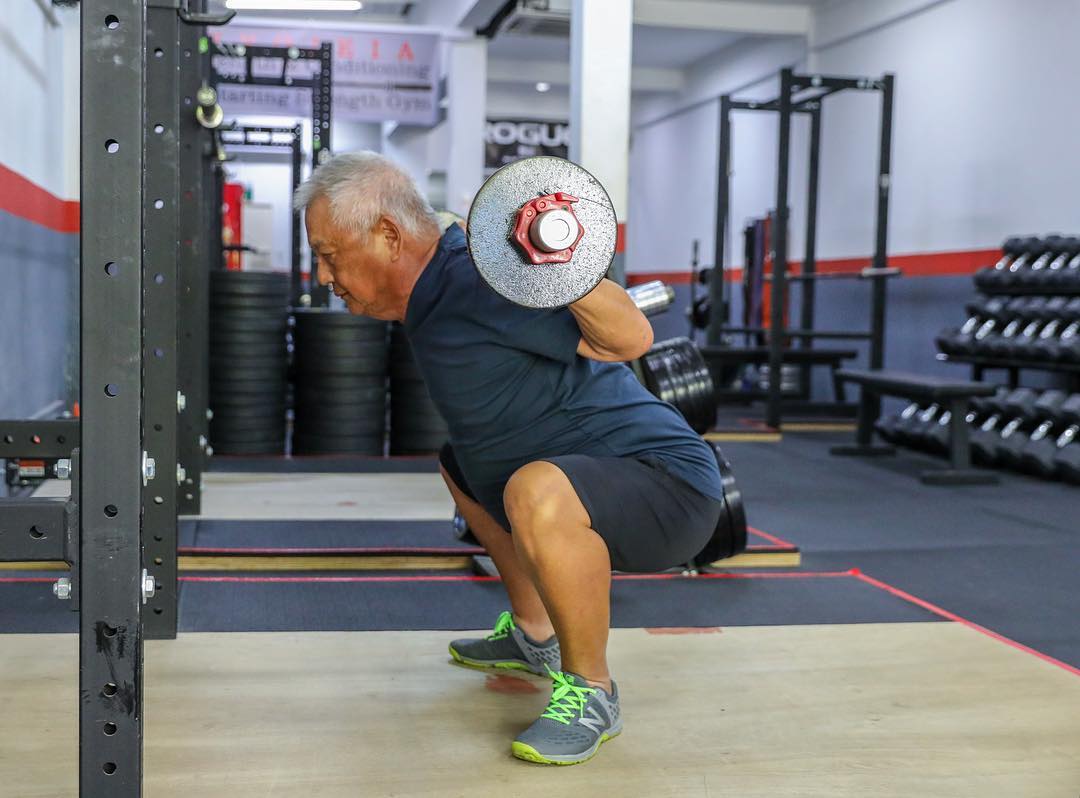
In the 19th century fairy tale “Goldilocks and the Three Bears”, a little girl named Goldilocks tastes three different bowls of porridge and finds that the perfect bowl of porridge is neither too hot nor too cold, but just the right temperature. Much like the porridge in the story, squat depth in barbell strength training can be too high, too deep or just the right depth. Optimal squat depth occurs when the lifter is utilising the longest effective range of motion — squatting to just below parallel — where the lifter’s hip crease sinks just below the top of the superior aspect of the patella.
In this article, we’ll be discussing how you can ensure that you’re hitting the appropriate depth while squatting. You can read more about optimal squat depth here, here and here.
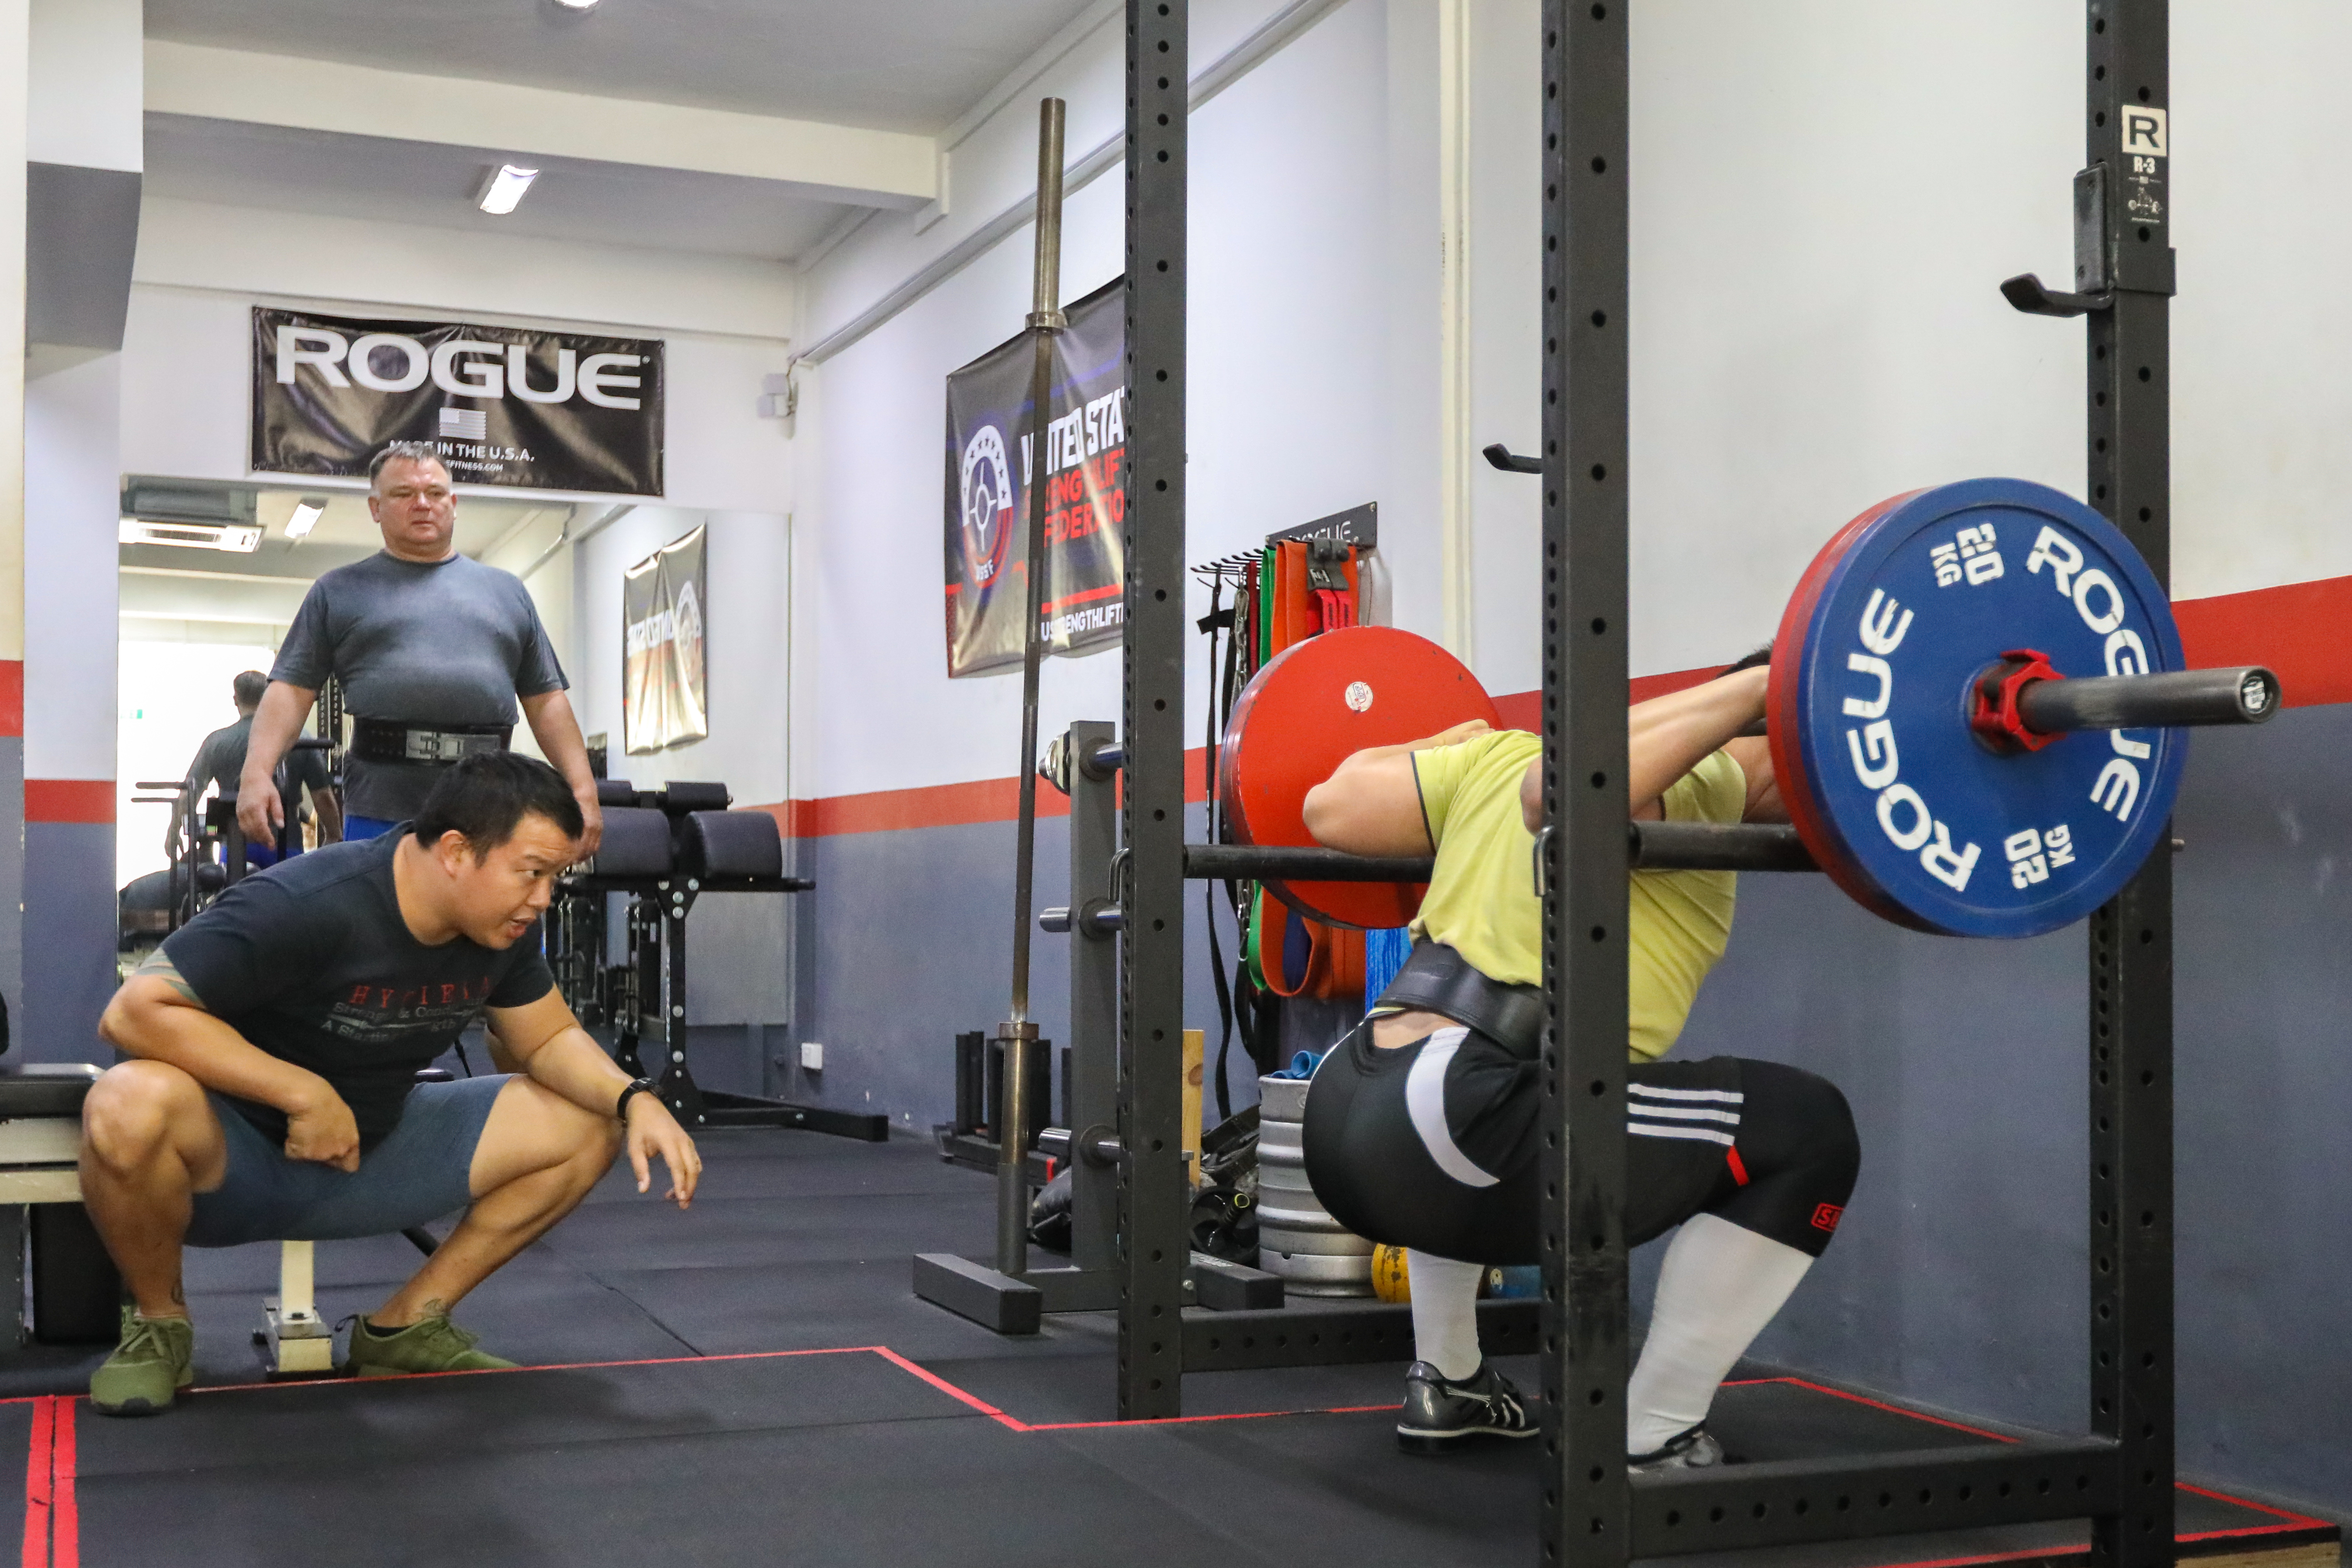
So now that you’re aware of the importance of appropriate depth in the squat, how can you be sure that you’re hitting the optimal depth? The most effective way is to have the in-person coaching of an experienced barbell coach. The experienced coaching eye of a barbell coach can spot the appropriate depth of a squat from across the room and the coach can give you immediate feedback and cues to fix your depth. This helps in a number of ways:
1. Being able to correlate how depth feels compared how it actually is.While having the sensation of the previous repetition still fresh in your head, receiving immediate feedback gives you awareness of how deep the squat felt compared to how deep it actually was. Having that calibration will help you to better gauge on your own how it should feel like when you hit the appropriate depth so that you can replicate it next time.
2. Being able to fix the depth issue immediately on the subsequent repetition. When you’re got a really heavy bar on your back, you don’t want to pause at the top and think “Hmmm, was that deep enough? I’m not sure if I should go way lower or just sink it a bit more”. Hearing the coach yell “Go way deeper” or “A touch deeper” helps to take the guesswork out.
3. Avoiding form creep. As the bar on your back gets heavier as your training progresses, you might be apprehensive to squat deep for fear that you might not be able to stand back up. Form creep is a gradual process – 1cm high this week, 2cm higher next week and before you know it, you’re doing half squats.
While being coached in person by an experienced barbell coach is very beneficial to your training, we understand that not everyone has access to this. In such situations, you must rely on your own judgement. So how can you be sure that you’re consistently squatting to depth? Here are a few methods you can employ to keep your squats to proper depth if you’re training on your own:
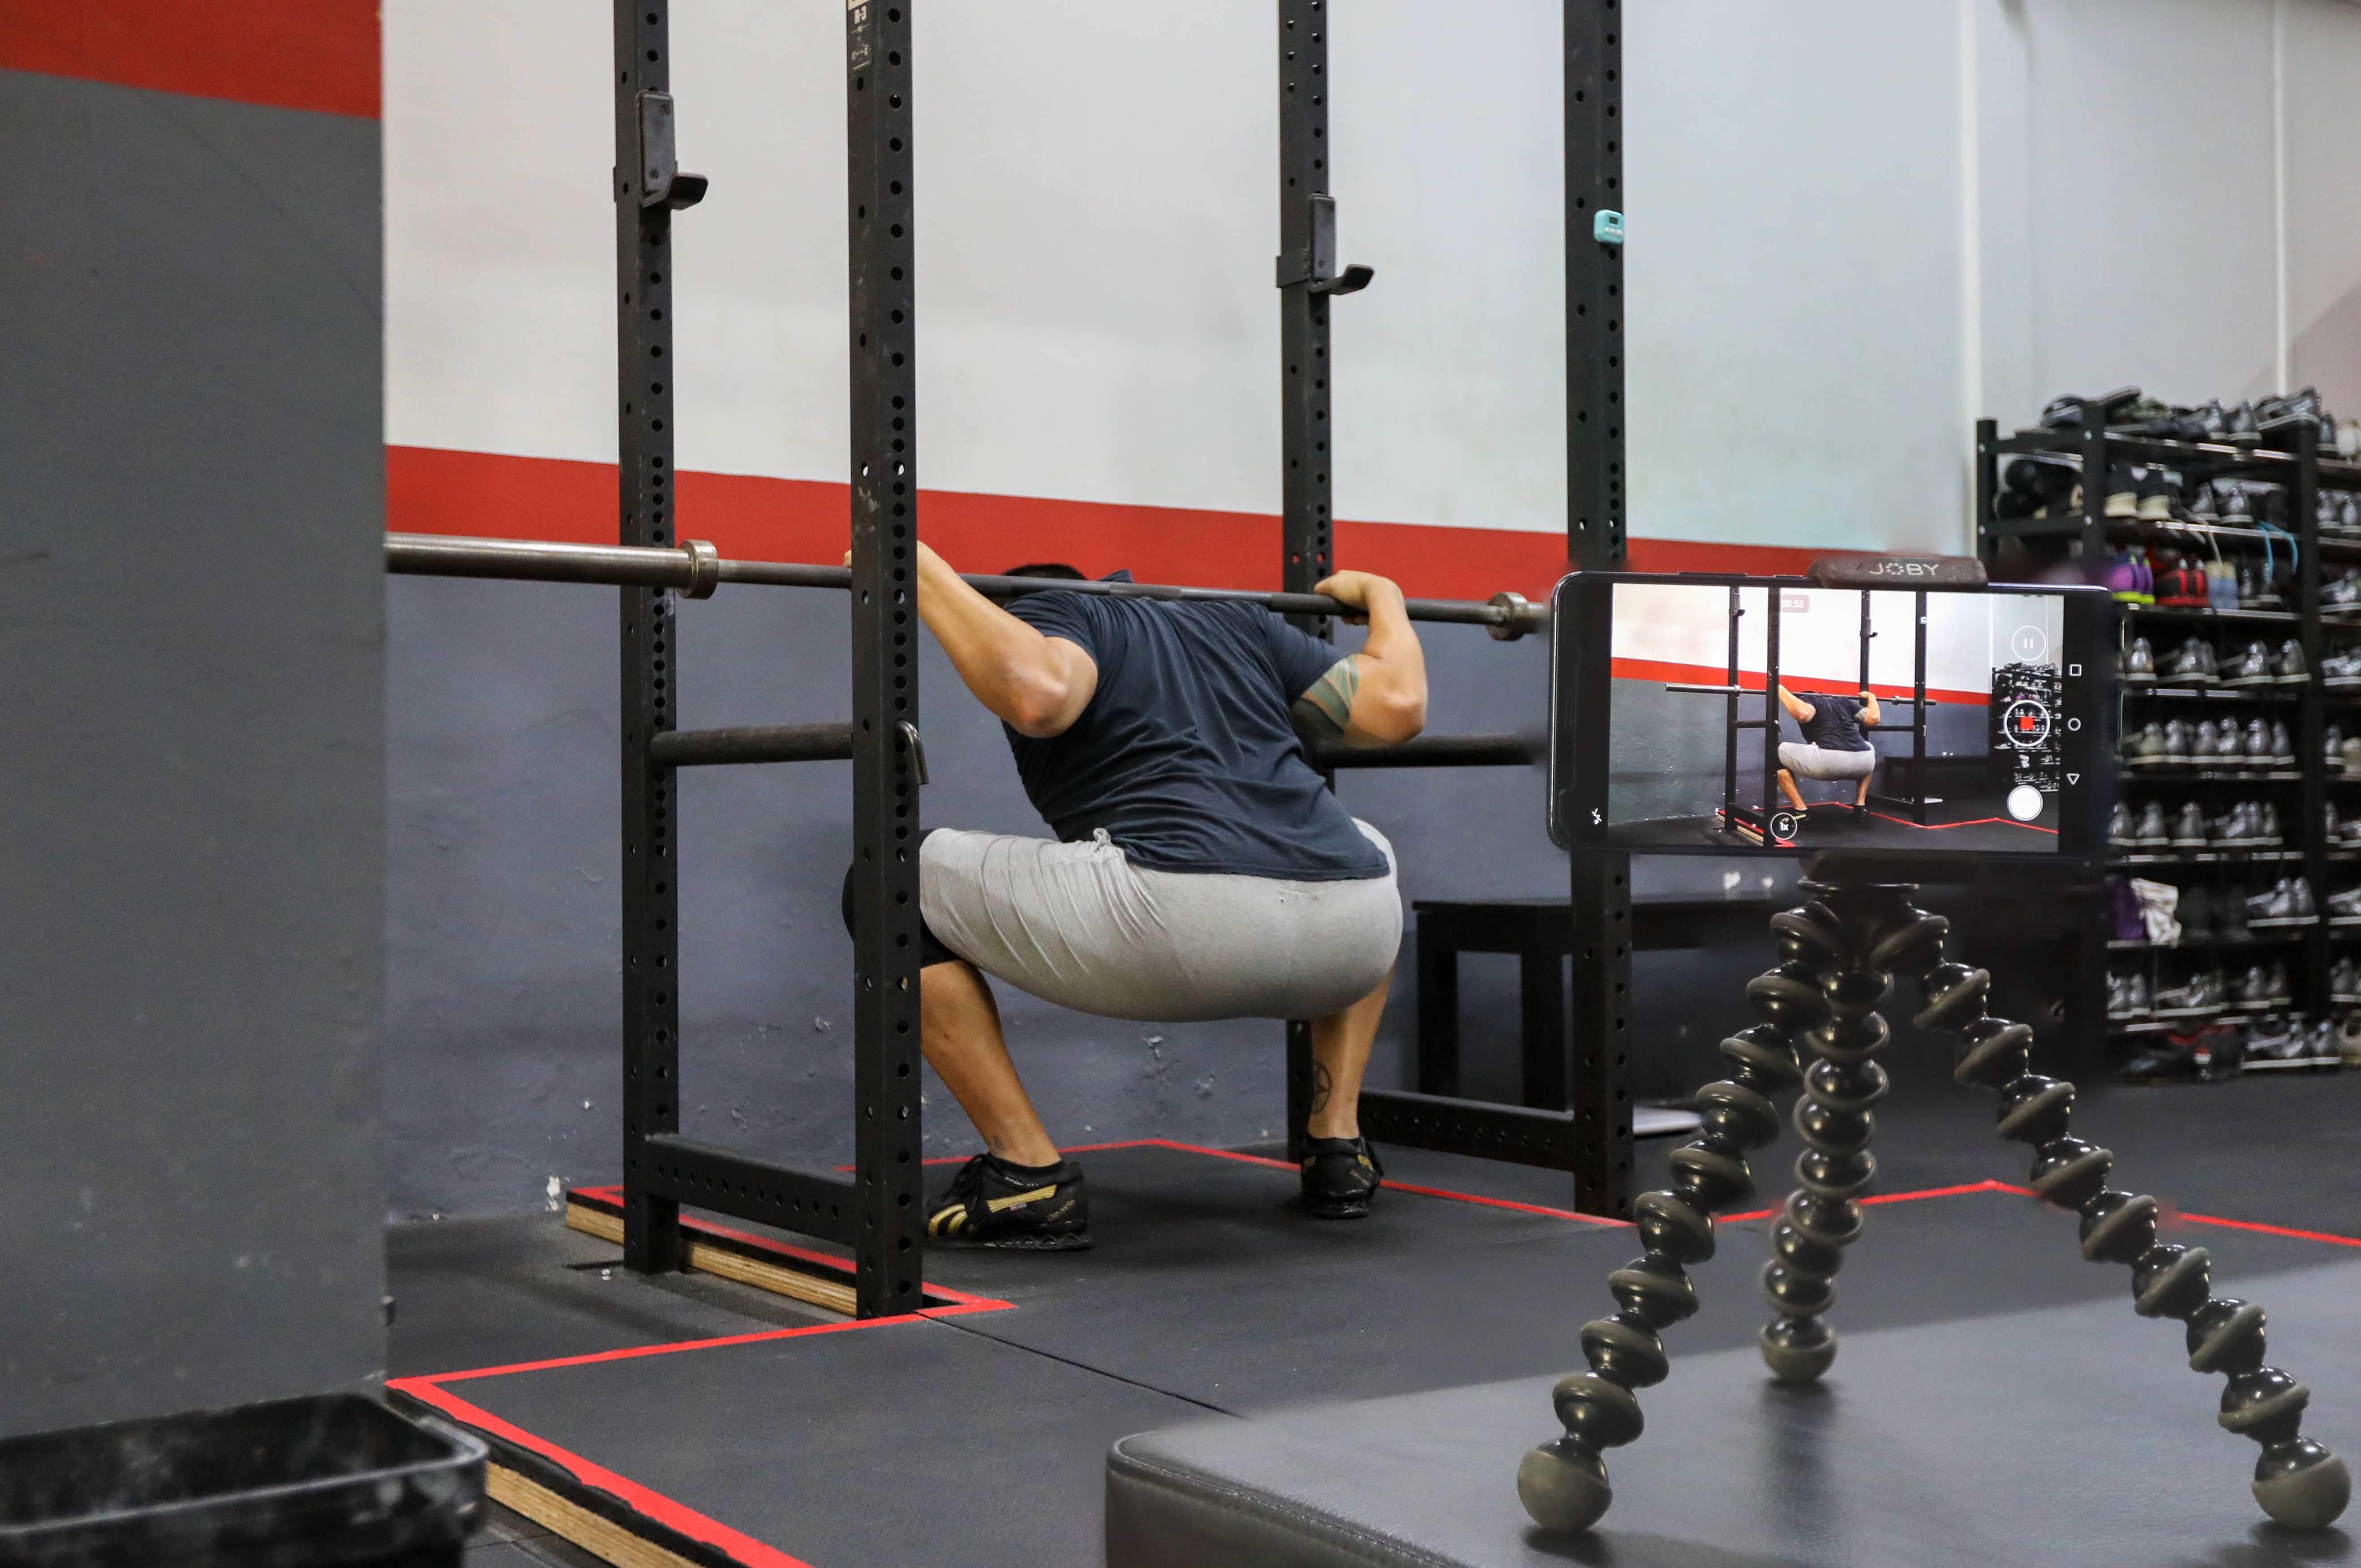
1. Video yourself. With most people having a camera in their pockets, shooting a video has never been more convenient. Set your phone up to video yourself squatting—45 degrees from the rear at hip height. Using a phone tripod with flexible legs that are designed to bend and/or wrap is highly recommended. The next part requires a bit of practice to hone your coaching eye.
You need to familiarise yourself what proper depth looks like. There are forums like this or this whereby you can post a video of your squat and receive critique from experienced coaches and lifters. Poke around these sites and you’ll find lots of videos from other lifters and feedback on their technique. Do this enough and you should be able to gather enough information to be able to differentiate between a squat that is too high, too deep or just right.
Once you’ve got that part down, start videoing your squats and review them after each set. From there, you should be able to have a better gauge of how you’re doing and make any adjustments on the subsequent set. Being honest with yourself is imperative —if you relax your standards, you might find yourself squatting higher and higher over time.
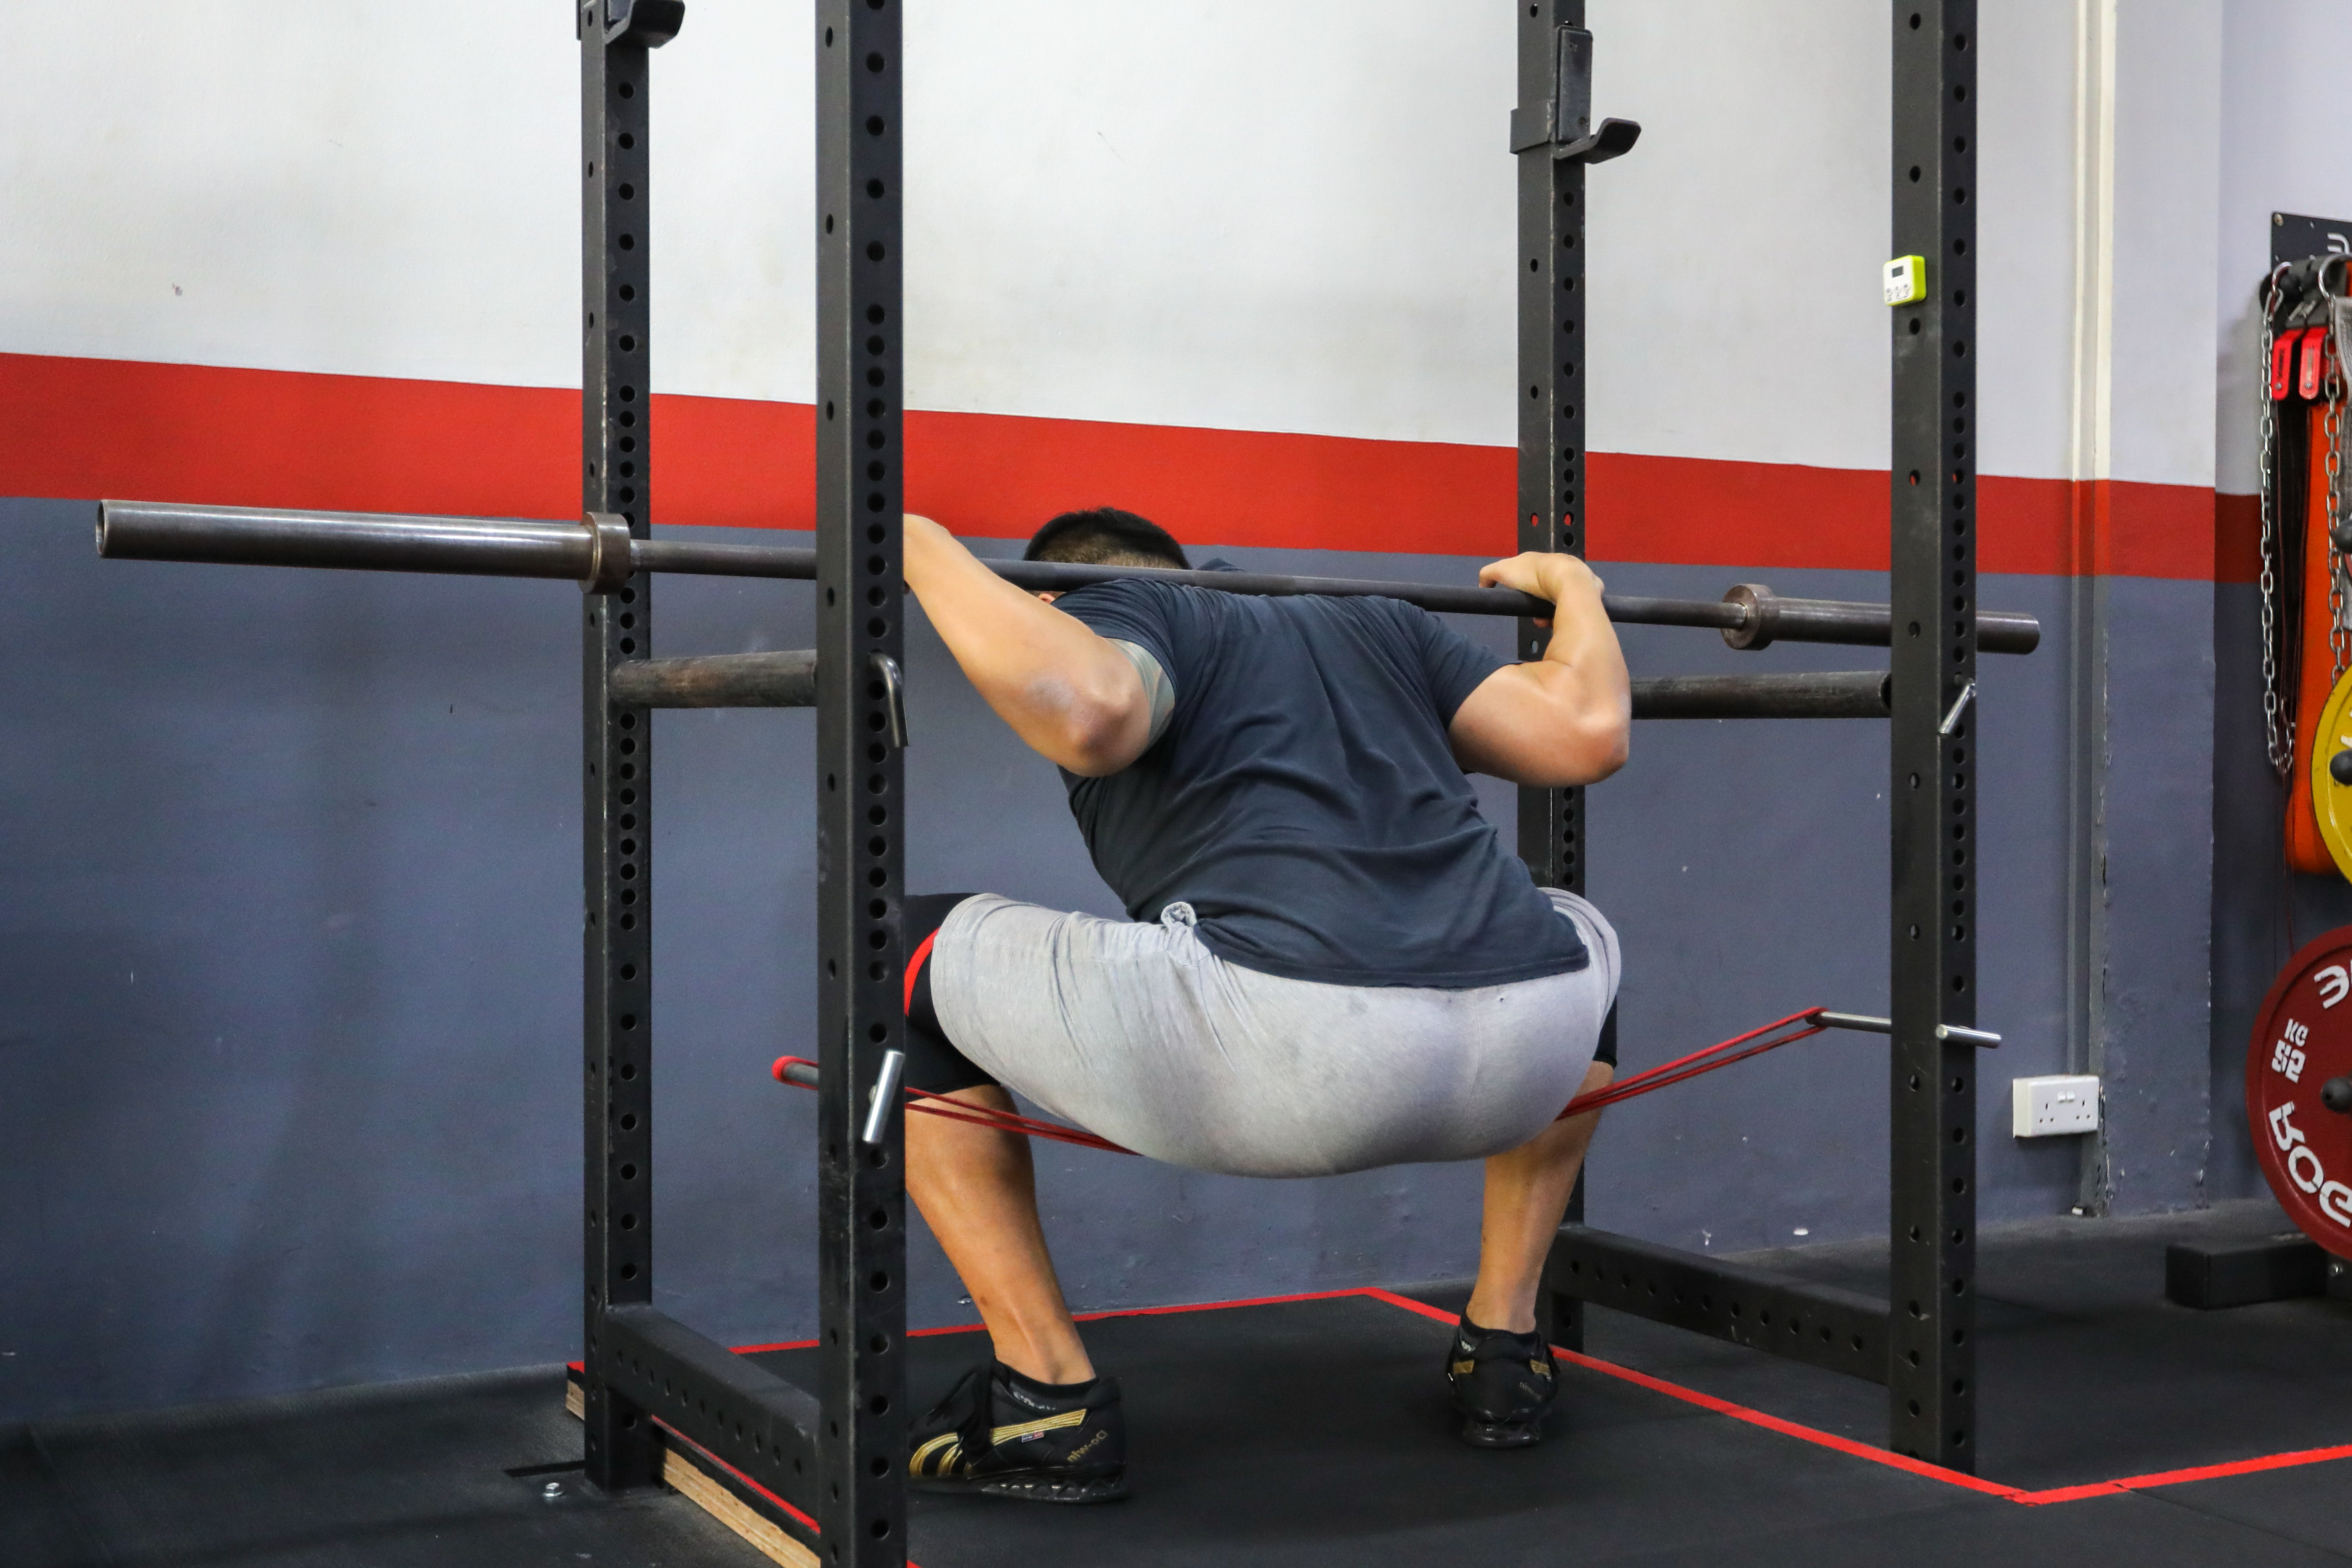
2. Set up a marker. If you prefer having immediate depth feedback while squatting on your own, setting up a marker can be useful. Before you do that, you first need to find out what proper depth is for yourself. To do so, follow the previous recommendation of videoing yourself. Once you’ve figured out the appropriate depth, stretch a resistance band across the rack so that your glutes will contact it when you hit proper depth. Use the thinnest band that you’re still able to feel when you contact it so as to minimise the stretch rebound from the band.
Place the band slightly above the lowest position of your squat. The band is more of a marker to inform you that you’re approaching optimal depth and that you need to decelerate and utilise the stretch reflex to rebound out of the hole to initiate the ascend. If you place the band so that your glutes contact it at the bottommost position, you’ll go too deep by the time you decelerate and start firing out of the hole. Finding the optimal position requires a bit of trial and error, but once you find it, setting it up on subsequent sessions will be pretty quick.
Using something deformable like a resistance band is much preferred over something solid like a box or stack of plates. Squatting to a box requires you to slow down drastically when you approach the box so that you can gently contact the box before reversing direction and beginning your ascend. This will teach you to slow down too much when approaching the hole and kills the stretch-shortening cycle that you want to utilise when coming out of the hole in the squat. On the other hand, going down quickly and hitting the box at speed with a loaded barbell on your back is a pretty bad idea.
Utilising the marker is not a long-term solution but rather an interim intervention to help you recognise the appropriate depth. Use it for a few sessions, then remove it and check if you’re able to consistently hit proper depth by reviewing your video.
Even with these methods, being able to consistently hit the appropriate depth while training on your own can be tricky when you’re starting out. Being proficient requires a keen sense of proprioception and loads of repetitions. More advanced lifters can immediately tell if they squatted high or went too deep and can fix it on the subsequent repetition. Nothing substitutes for practice—put in the work, spend sufficient time under the bar and you’ll eventually get it.
While there are no compelling reasons one should squat high apart from a prohibitive injury or condition, there are circumstances whereby you’d want to perform a full range-of-motion squat, aka an ass-to-grass (ATG) squat. An ATG squat is when you descend all the way down till your hamstrings contact your calves before you start to ascend. If you fancy the sport of weightlifting, you’ll have to train the front squat with a full range of motion because the catch position of the clean and jerk and snatch is an ATG squat. If you’re a strongman, ATG squats/front squats will also have be trained so that you have carryover to events like the Atlas Stones. Since strength is gained in the range of motion in which it’s trained, an ATG squat/front squat will be an important part of your training regime. However, if your goal is to get generally strong, sinking your hip crease just below the top of the superior aspect of your patella would be optimal and now you know how to gauge that perfect depth.